Wednesday, May 30, 2012

CONGRATS!

Hey Everyone,
   I have a card to share with you today. This time I made a masculine card, I made this for my nephew (HS graduation). This is my favorite technique to make all the time and I will never get tired of this technique. I used some of my distress inks, clear stamps, sizzix textured folder, embossing powder and that's it, so fun and easy! So here it is, I hope you like this one :)

Click HERE to see this card in the making!

Thanks, for looking!
Hugs, Jas

Click here for my: BLOG CANDY GIVEAWAY!

Most of my creations are have a video tutorial and you can find my videos on my Youtube channel (Craftgalore108). I always update my Blog and my YT every time I have created a new project. Please, subscribe on my YT channel and in this blog if you haven't done it yet... so you won’t miss new ideas and giveaways in the future. xoxo Jas

Thursday, May 24, 2012

"HI" - handmade card using TGF CC Madden

Hey Everyone,
    Eeeek, I made this card for the TGF Farm Fresh Friday and I only have few hours left! I used TGF CC Madden. The theme was Black and White with 1 other color. I used Kaiserkraft paper for the background and silver foil. I chose Silver as the other color :) I dry embossed the silver background and added doilie behind it and added tag that I cut from my cricut machine. Flowers and rolled roses that I made using mft die-namics. Distress all the edges with black soot and ripped the other side of the paper and for CC Madden I colored her using my copic markers and sakura silver gel and then added black flat pearl bead on the side. I hope you like this card that I made.

Video tutorial for this card Click HERE.

Thanks, for looking!
Hugs, Jas

I'm entering this card to the following challenge(s):

Click here for my: BLOG CANDY GIVEAWAY!

Most of my creations are have a video tutorial and you can find my videos on my Youtube channel (Craftgalore108). I always update my Blog and my YT every time I have created a new project. Please, subscribe on my YT channel and in this blog if you haven't done it yet... so you won’t miss new ideas and giveaways in the future. xoxo Jas

Monday, May 21, 2012

Hello Kitty 11"x 14" Layout


Hey Everyone,

    I’m back with another layout to share and this time it’s all about the cuteness. This layout that I made is for my niece, she’s celebrating her birthday this month. Yes, I have a ton of nieces and nephews so you guys are going to get tired of hearing me saying it over and over, lol! Anyhoo, so I made this for her because she likes Hello Kitty and she does Ballet and I thought of why not combine the two things that she likes, right. So that’s how I started creating this cute layout for her. The size of this layout is 11”x14” it’s the size of the frame that I used. So the chipboard that comes with the frame that’s what I used for the base to keep it sturdy. I actually had a hard time finding the right background pattern paper for Hello Kitty. So I decided to go for just plain with a little designed on it…so little that you can’t really see it on the picture but on my video tutorial you will see the design of the background paper. I used the Recollections paper and I used another patterned paper called Pink Plaid for the border and it’s from Recollections as well. It’s really nice combination for Hello Kitty theme and perfectly turned out the way I wanted and pictured it.  I used my cricut cartridge Hello Kitty Font to cut the HK Ballerina the size was 5". I added some sparkles and glossy accents on HK dress and shoes. Of course, I won’t forget adding my doilies and some embellishments lace trims, pearl bead trim, rhinestones, mulberry flowers, butterflies using my Martha’s S. punches. I also stamped on the background paper with my clear stamps swirls and I used Jenni Bowlin inks. It was addition on the layout not so boring…well, I think I over do it this time, lol! I didn’t put a photo because I wanted to surprise my niece and my sister at the same time.

Alright, I think this really long for me now, lol! Click HERE  for you to see on how I created this layout, enjoy watching :)


Thanks, for looking!
Hugs, Jas

Click here for my:  BLOG CANDY GIVEAWAY!

Most of my creations are have a video tutorial and you can find my videos on my Youtube channel (Craftgalore108). I always update my Blog and my YT every time I have created a new project. Please, subscribe on my YT channel and in this blog if you haven't done it yet... so you won’t miss new ideas and giveaways in the future. xoxo Jas


Friday, May 18, 2012

Simple and Elegant Gift card holder


Hey Everyone,

     Happy Friday! I wanted to share this gift card holder that I made. These are actually for my niece for her sixteen bday next month. I really like how it turned out, it’s so simple and elegant at the same time. In fact, I like it so much I decided to add these to my etsy store :) I hope you like these gift card holders.

 ( To watch my video tutorial on how I created this card please click HERE)


Thanks, for looking!
Hugs, Jas

Note: Most of my creations are have a video tutorial and you can find my videos on my Youtube channel (Craftgalore108). I always update my Blog and my YT every time I have created a new project. Please, subscribe on my YT channel and in this blog if you haven't done it yet... so you won’t miss new ideas and giveaways in the future. xoxo Jas

Sunday, May 13, 2012

A Mother's Day Vintage Layout


Hey Everyone,

    Happy Mother’s day to all the mom’s out there. I wanted to share this Vintage Layout that I just finish and really glad that I’m able to finish it today. I made a  12x12 layout with a photo of my mom, I hope she’s looking down and like what I did :) Her photo I believe she was 18yrs. old.  Happy Mother’s day, mom! You may no longer here with us but I know you still watching over us. I love you and miss you sooo much!

    I started it with the patterned paper from K&Company and then most of the embellishments that you see in this layout were from Recollections, Prima, Wild Orchids, frame from Michaels dollar bin, the butterflies from my stash. I ripped the edges and distressed it with my distress ink Walnut stain then added gold paint on it. Then I added lace and doilies and I heat embossed the sentiments with gold embossing powder. Pretty simple and I love how it turned out. I hope you like this layout that I made and see you next time.

To see Tutorial Video for this layout Click HERE


Thanks, for looking!
Hugs, Jas

Note: Most of my creations are have a video tutorial and you can find my videos on my Youtube channel (Craftgalore108). I always update my Blog and my YT every time I have created a new project. Please, subscribe on my YT channel and in this blog if you haven't done it yet... so you won’t miss new ideas and giveaways in the future. xoxo Jas


Friday, May 11, 2012

You Totally Rock!


Hello there,

        Happy Friday everyone! So here I am again and with another card to share with you. I used CC Leslie TGF rubber stamps. I made this card for not knowing what the theme is going to be, I just want to color her up with my copics, lol!  Then I added glitters to make it look like it has nice matted edge.  I used some of my scraps for the background and I also used the sentiment from the TGF. I added glitters and glossy accents on the flower to make it sparkle and added button for the center.  Another simple card as always had fun creating it. I hope you like this one.

To see the Tutorial Video for this card Click HERE
Thanks, for looking!
Hugs, Jas

Entering this card for the following challenge(s):


Wednesday, May 9, 2012

Bloom Where You Are Planted


Hi Everyone,

       A rainy wednesday here at MA, but I have something to share with you today. This time I used Pretty Patches from Belle’s and Whistles clear stamps. Another cute stamp, I really enjoyed coloring her  with my copics and tried really hard to match the background paper that I used and it’s from my scraps J I used my Martha Stewart punch butterflies, love this punch! Then I just pop them all up to make it look 3D. Even some of the flowers I tried to copy and just make it look 3D as well. Added sakura gel pen my favorite and glossy accents on the butterflies punched. The sentiment is from MFT. I hope you like this one, have a nice day!

To see the Tutorial Video for this card Click HERE


Thank you for looking!
Hugs,Jas

I'm entering this card for the following challenge(s):


Monday, May 7, 2012

Summer Fun!


Hey Scrappy Friends,
                   Happy Monday! I’m here to share a card for you today, I used TGF Oliver & Amelia rubber stamps. I thought of using these two adorable stamps that I haven’t use and so here is my card. Colored them with my copics and added some glossy accents on Oliver’s swimming gears his floater, the ball and also on Amelia’s swimsuit too but it doesn’t show on the picture.  Anyhoo, I had fun coloring them as always. The background paper was from Echo park SUMMER DAYS.  The sun and the sentiment are from Michael’s dollar bin stamps. Then I just added a heart button just for fun! Very simple and I hope you like it.

To see the Tutorial Video for this card Click: HERE

Thank you for looking!
Hugs, Jas

I'm entering this card for the following challenge(s):


Wednesday, May 2, 2012

Topiary Centerpiece using Spackle

Hey Everyone,

       Wow, finally my big project is done! I'm excited to share these Topiary Centerpieces that I made for my niece sweet sixteen this coming June 2012! Most of the Topiary are made with real flowers, fabric flowers, tissue paper, or paper flowers…but I made mine using spackle…yes, spackles and paper flowers. I've worked on spackles before with my cupcakes and loved it! (Watch out for that as well).  I have not seen one Topiary that made out of Spackles! I had so much fun making these, I even paint my own pots since needs to be all the same and hard to find a cheaper pot. So I decided just to buy an ordinary pot and just painted it. By the way her favorite color is purple as you can see.


       You can create this for any occasions, it’s endless for parties! Also, good for display or decorations etc... I will share step by step on how I created this beauty!

*Be aware about the warning signs using spackles before you decide to use it*
*Not intended for kids*

Some of the stuff that I used.


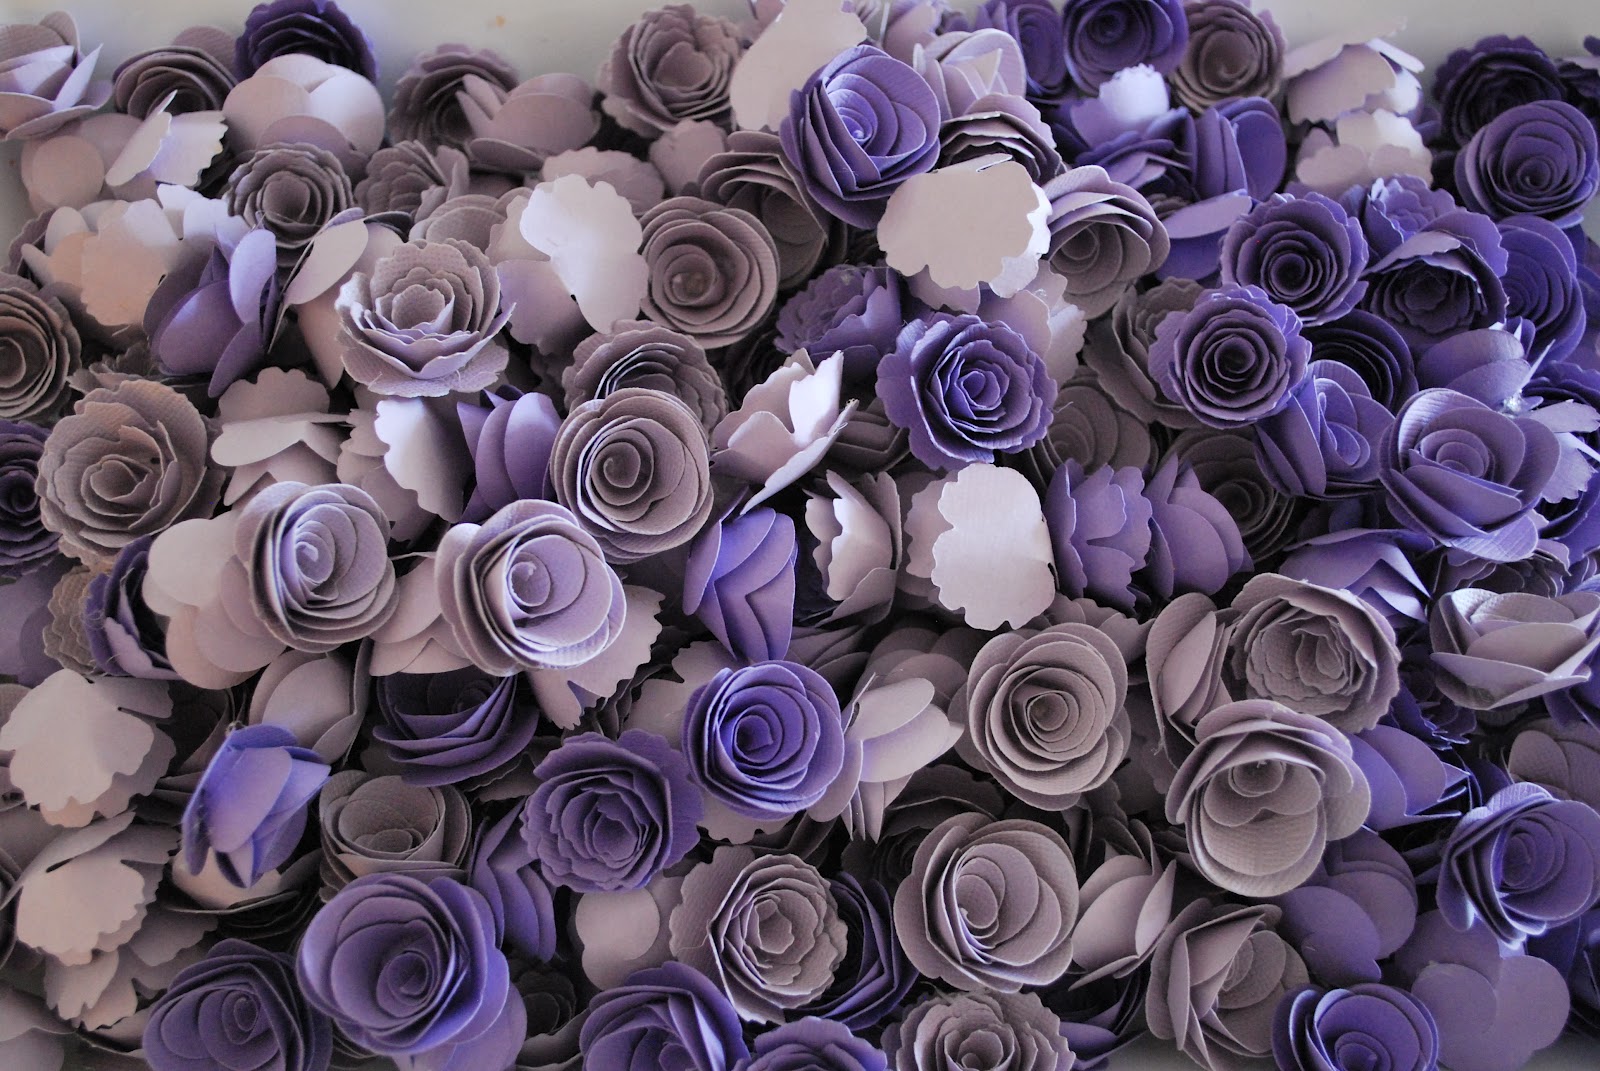
MFT-dienamics Rolled roses and Royal rose

Letting it dry as you can see, I've used Plaster of paris
to hold the topiary in place.

Embellishments


Yay, finished 21 Topiary centerpieces!


Materials I used for this project: (Note: some of these materials are not on the picture)
Flower pots
Dowels
Styro foam ball
Plaster of Paris
Hot Glue
Glue gun
Tacky Glue
Ribbon
Pearl trim
Spackle
Scissor
MFT die-namics (Rolled rose and Royal rose dies)
Acrylic paint
Lace trim
Ribbon Buckles
Spanish Moss
Decorating tool (baking)
Gesso
Mod Podge
Paint brush

First step: Prepare the paper flowers or any decorations that you want to put first. I used MFT Die-namics for this project.

Second step: (Flower pot you can use already decorated pots so you can just skip this)

     -       Apply Gesso all over the pot, let it dry.

     -          Then paint the pot with the desired color you want.

     -          For finishing it I used Mod Podge and mixed it with Sparkle Glaze to add sparkles.

Third step:

     -          Make a hole on the styro foam ball and then stick the dowel inside using hot glue gun.

     -          Make sure you have a place for this topiary to dry and needs to be able to stand still. Once you apply the spackle you cannot lay it flat on the surface it needs to stand still.

Forth step: (Start using spackles it takes 1-2 days to dry it depends on the location)

     -          Using tool for decorating cakes by Wilton products.

     -          You can use any tip you like to create your design.

     -          First I mixed acrylic paint and spackle together and stir it with any spatula or mixing tool you have that you don’t use.

     -          Once you mixed it now start applying it to the styro foam ball. Using the cake decorating tool.  It’s just like you’re decorating cake…it’s really fun!

     -          I hold on to the dowel while I apply the spackle and it’s easier for me to move it and have a control on how I want the spackle to look.

      -          Then while still wet adhere the paper flowers on the spackle. Then as the spackles dry the flower will stick to it.

      -          Another option: If you decided not to put any paper flowers. Once you’re done applying spackles all over the styro foam ball. Let it dry or best wait the next day to apply another spackle to add different color to make it look like a flower. Just like what I did on the other photo.

       -          Then wait for the spackles to dry completely.

Fifth step: Decorating the dowels

       -          I used Tacky Glue to adhere the ribbon to the dowel.

       -          Then added pearl trim using hot glue to make sure it won’t come off.
               (I just apply hot glue on the top and bottom of the pearl trim)

        -          Then I made some ribbons to adhere it at the bottom of the styro foam ball.

Sixth Step: Using Plaster of Paris

        -          I used Plaster of Paris to hold the topiary but before that I attach it with some styro          foam to help it to stand still then added the plaster of paris.

        -          When it dries I added the Spanish moss and added some flowers on top.

        -          To finish it off I used some lace trim around the top edge of the pot and added some ribbon buckle, half flat pearl bead and butterfly.

                              *Then your Topiary Centerpiece is done!

I hope you enjoy this project that I made and hope to see your creations. Hugs, Jas :)
Related Posts Plugin for WordPress, Blogger...